Showing posts with label crafts. Show all posts

Wednesday, December 8, 2021

Paper Plate Angels

Celebrating the season.
Kiddos in our after-school program
had a BLAST crafting these angels! 
I just adore how unique each angel is.
It always amazes me… 
even when the same materials are use to create with, 
no two are alike. 

Materials:
Paper plate
Sharpie (black)
Scissors 
Oil pastels
Paint (tempera)
Glitter glue 


Monday, November 1, 2021

A Round Up

 Fall/Halloween Arts & Crafts for Kids


All of these turned out terrific! 

Best part, the kids had a wonderful time creating them. 

Let's begin starting from the upper, left photo.


Paper Bag Pumpkins: (brown paper bag)

Filled with newspaper, wrapped the tops with green yarn. 

Set out paints, construction paper (black) scissors, and glue. 


Spooky Moon- Bats Are Out ( oil pastel drawing/craft) 

Card stock paper, oil pastels, construction paper (black), pencil (draw out bat template), scissors and glue.


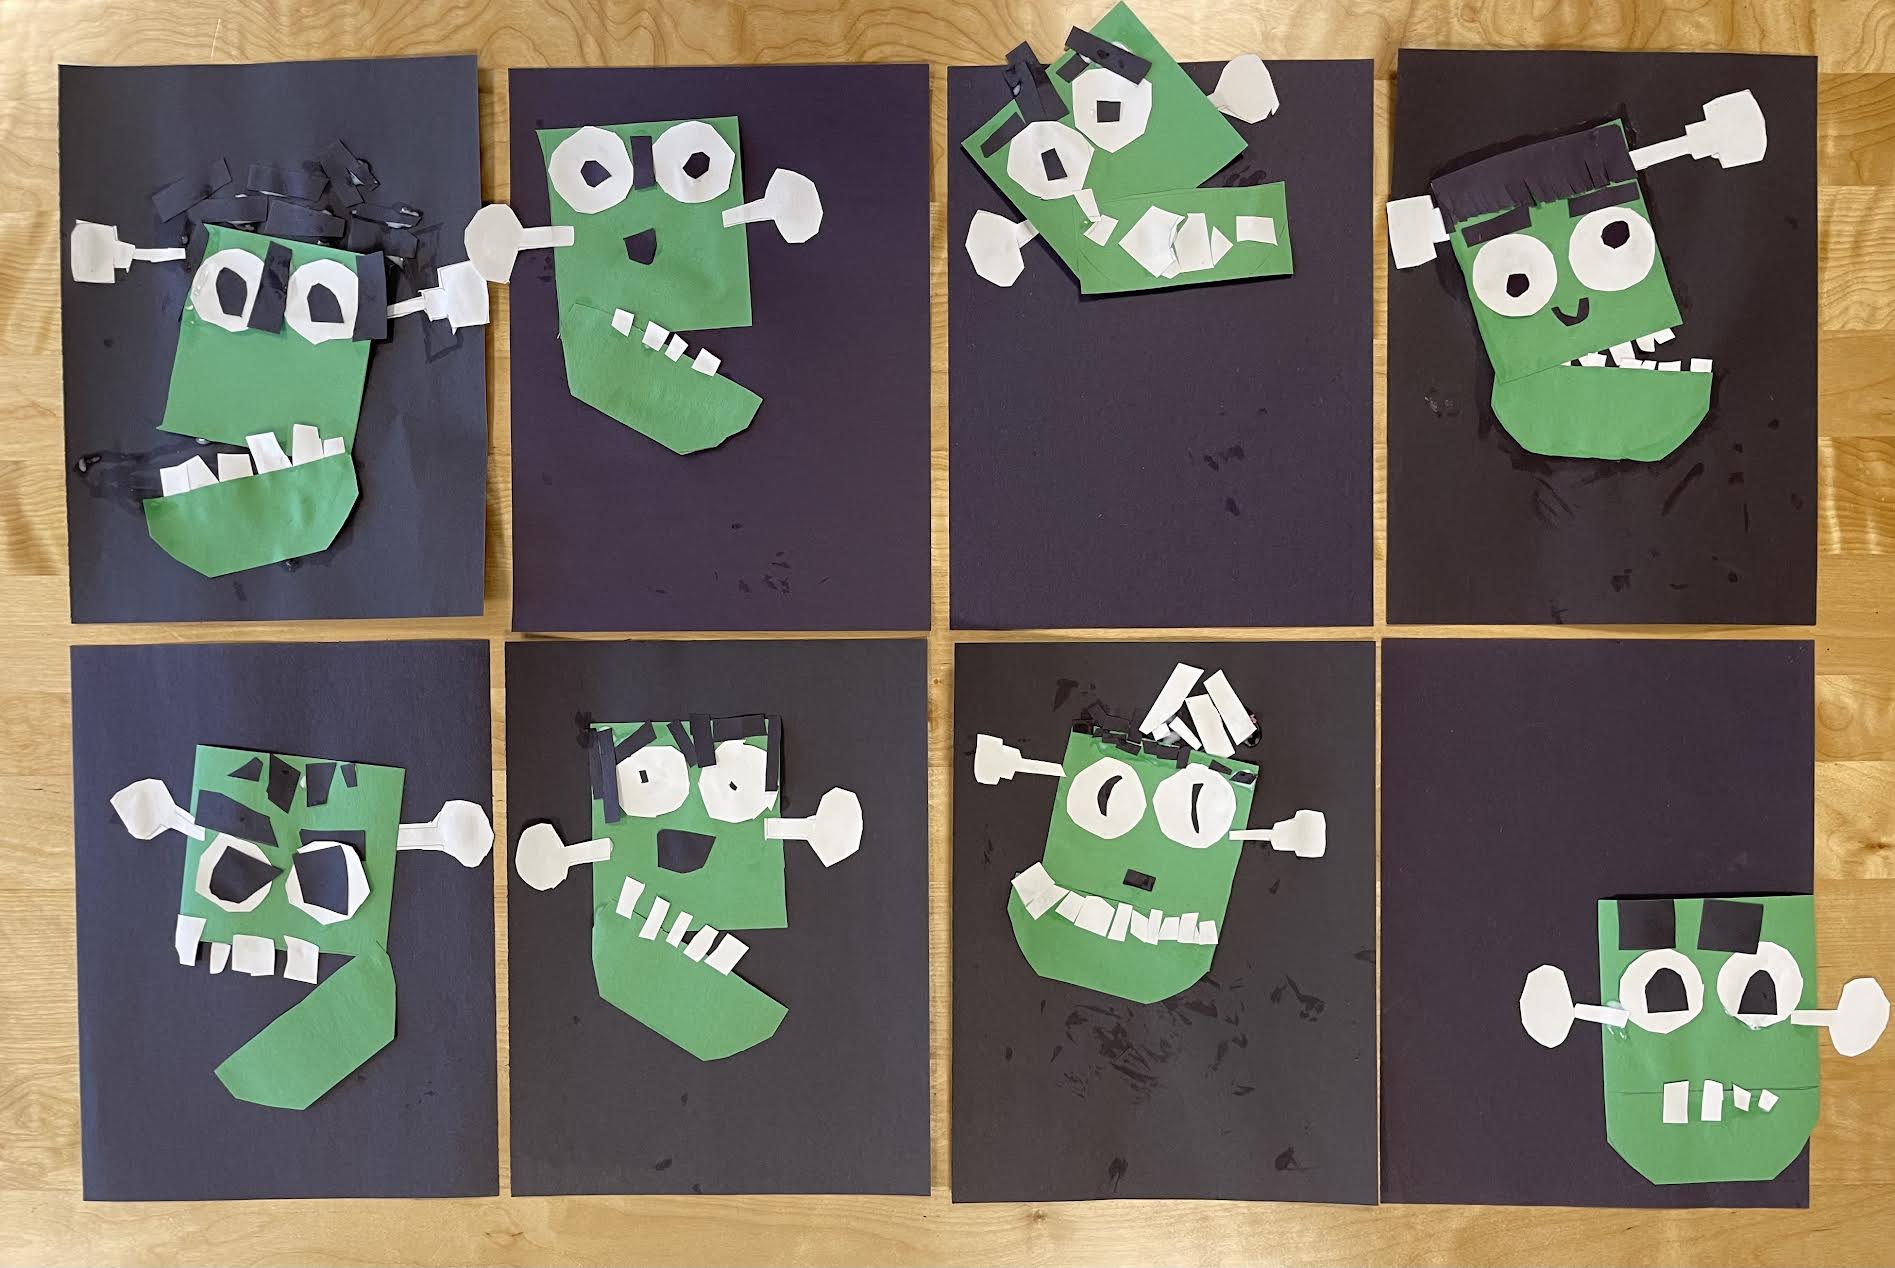
Frankenstein Portraits:

Construction paper black, green, white. Scissors and glue.


Fall Mason Jar luminaries:

Mason jars, tissue paper (colors), scissors, mod podge, paintbrushes, and tea light.


Opened- Ended Art: Orange circles 

Butcher paper (rolled out0, tempera paint (orange), oil pastels (black, orange, green, yellow).


Bats: (papertowel rolls) 

Paper towel rolls (cut three sections), construction paper (black, white,red, pink, purple, scissors, pencil (draw out bat wings, eyeballs, mouth, teeth, ears), and glue.  


Monday, April 21, 2014

wrapping myself in color...

 pocketbook- art project 
Where you will find me these days... all wrapped up in color. 
Creating fun, artful projects for the pure joy and happiness it brings me. 
The thought of, "because I can!" comes to mind. 
No pressure. 
No rules.
With this state of mind, comes a certain "freedom".
It reflects in our artwork, don't you think? 
This pocketbook project will be shared among our art community HERE 
for an exciting event being scheduled this month. 
As we exchange our talents within the group, we also are building friendships.
Amazing right? 
Playing with paper, paint and making friends along the way... 
Life is beautiful, life is full of color. 
materials used:
recycle envelopes- junk mail
cardboard
painted paper
rubber stamps
acrylic paint 
glue stick 
  
wrap yourself in color. 


Tuesday, April 8, 2014

in the studio...

textured panels
exploring more with these chipboard panels. 
no expectations, same attitude... different approach. 
Process:
layers of paint, ruff sandpaper, and joint compound... panels are holding up well. 
Art therapy time. 
These panels speak to me-  
showing me even after going through a difficult time; their beauty till shows through.

enjoy 


Friday, April 4, 2014

in the studio...

chipboard panels 
approaching these with a whole new attitude.  
with no expectations. perfection not allowed. 
exploring. playing. dreaming... art therapy time.
These chipboard panels can take a lot of abuse... I can pile on the layers. 
Texture heaven I tell you, adding tons of mediums and where it leads me... who knows!
I have a total of 8 chipboard panels: 
cut some of the boards different sizes, to add interest to the finished project. 
This just might make a wonderful art book, will post more panels as I create them. 

enjoy


Thursday, March 13, 2014

Creating a Triptych

mini tutorial 
I am super excited to share this project with you! 
Actually, this is my very FIRST attempt to creating a triptych. 
Our Facebook group The Studio - artist community  is having an event- Triptych Swap.
This swap is being hosted by a one of our dedicated member's, Artist Diana Darden who decided on having participants create a triptych with a Spring theme. 

Let us begin... 
1. download on card-stock, this template Triptych
2. using corrugated cardboard, cut out shape. 
 3. apply layers of acrylic paint. add depth and texture using stencils.
4. using rubber-stamp images on coffee stained paper as accents to embellish the theme.
5. position your images; once you are happy with the arrangement, apply craft glue.
6. note: this triptych is required to have BOTH sides fully crafted. 
paper dollies are applied with matte medium. once dry, apply layers of acrylic paint for dimension.
7. the door hinges are carefully hand-sewn together using embroidery floss. 
triptych project complete!
enjoy the tutorial.


Monday, February 17, 2014

Got a "bright" idea for a project...

altered lightbulb- mixed media project 
Before you go throwing away the next lightbulb that goes out... try altering it!!

materials required for project:

collage sheet- Curiosities-of-Nature
collage sheet- Le-Papillon-Magnifique
tissue paper
matte medium 
acrylic paint 
embossing powder
jewelry wire 

Lights out everyone!